IOS Certificate (. P12) and description file (. Mobileprovision) application
Prepare the environment
- You must have an apple developer account and have joined the “IOS Developer Program”
- Mac OS 10.9 or above (not required if p12 certificate has been applied)
Log in to IOS Dev Center
Open the website IOS Dev Center
Log in to IOS Dev Center with Apple Developer account:
After successful login, select “certificates, IDS & profiles” on the left side of the page to enter the certificate management page:
On the certificate management page, you can see all applied certificates and description files:
First, you need to apply for an Apple App ID (the unique ID of the app)
Select “IOS, tvos, watchos” for the platform, and “explicit” for the bundle ID. fill in the description with the description, and then fill in the bundle ID. to keep the bundle ID unique, it is recommended to fill in the format of anti domain name and application identification, such as:“ io.dcloud.hellouniapp ”And then click “continue”
Note: in hbuilderx, this bundle ID is filled in the appid column of the interface when the app submits cloud packaging
Next, you need to select the service that the application needs to use (if you need to use the message push function, select “push notifications”), and then click “continue”
Note: if the app cannot use the service, it must not be checked to avoid responding to the audit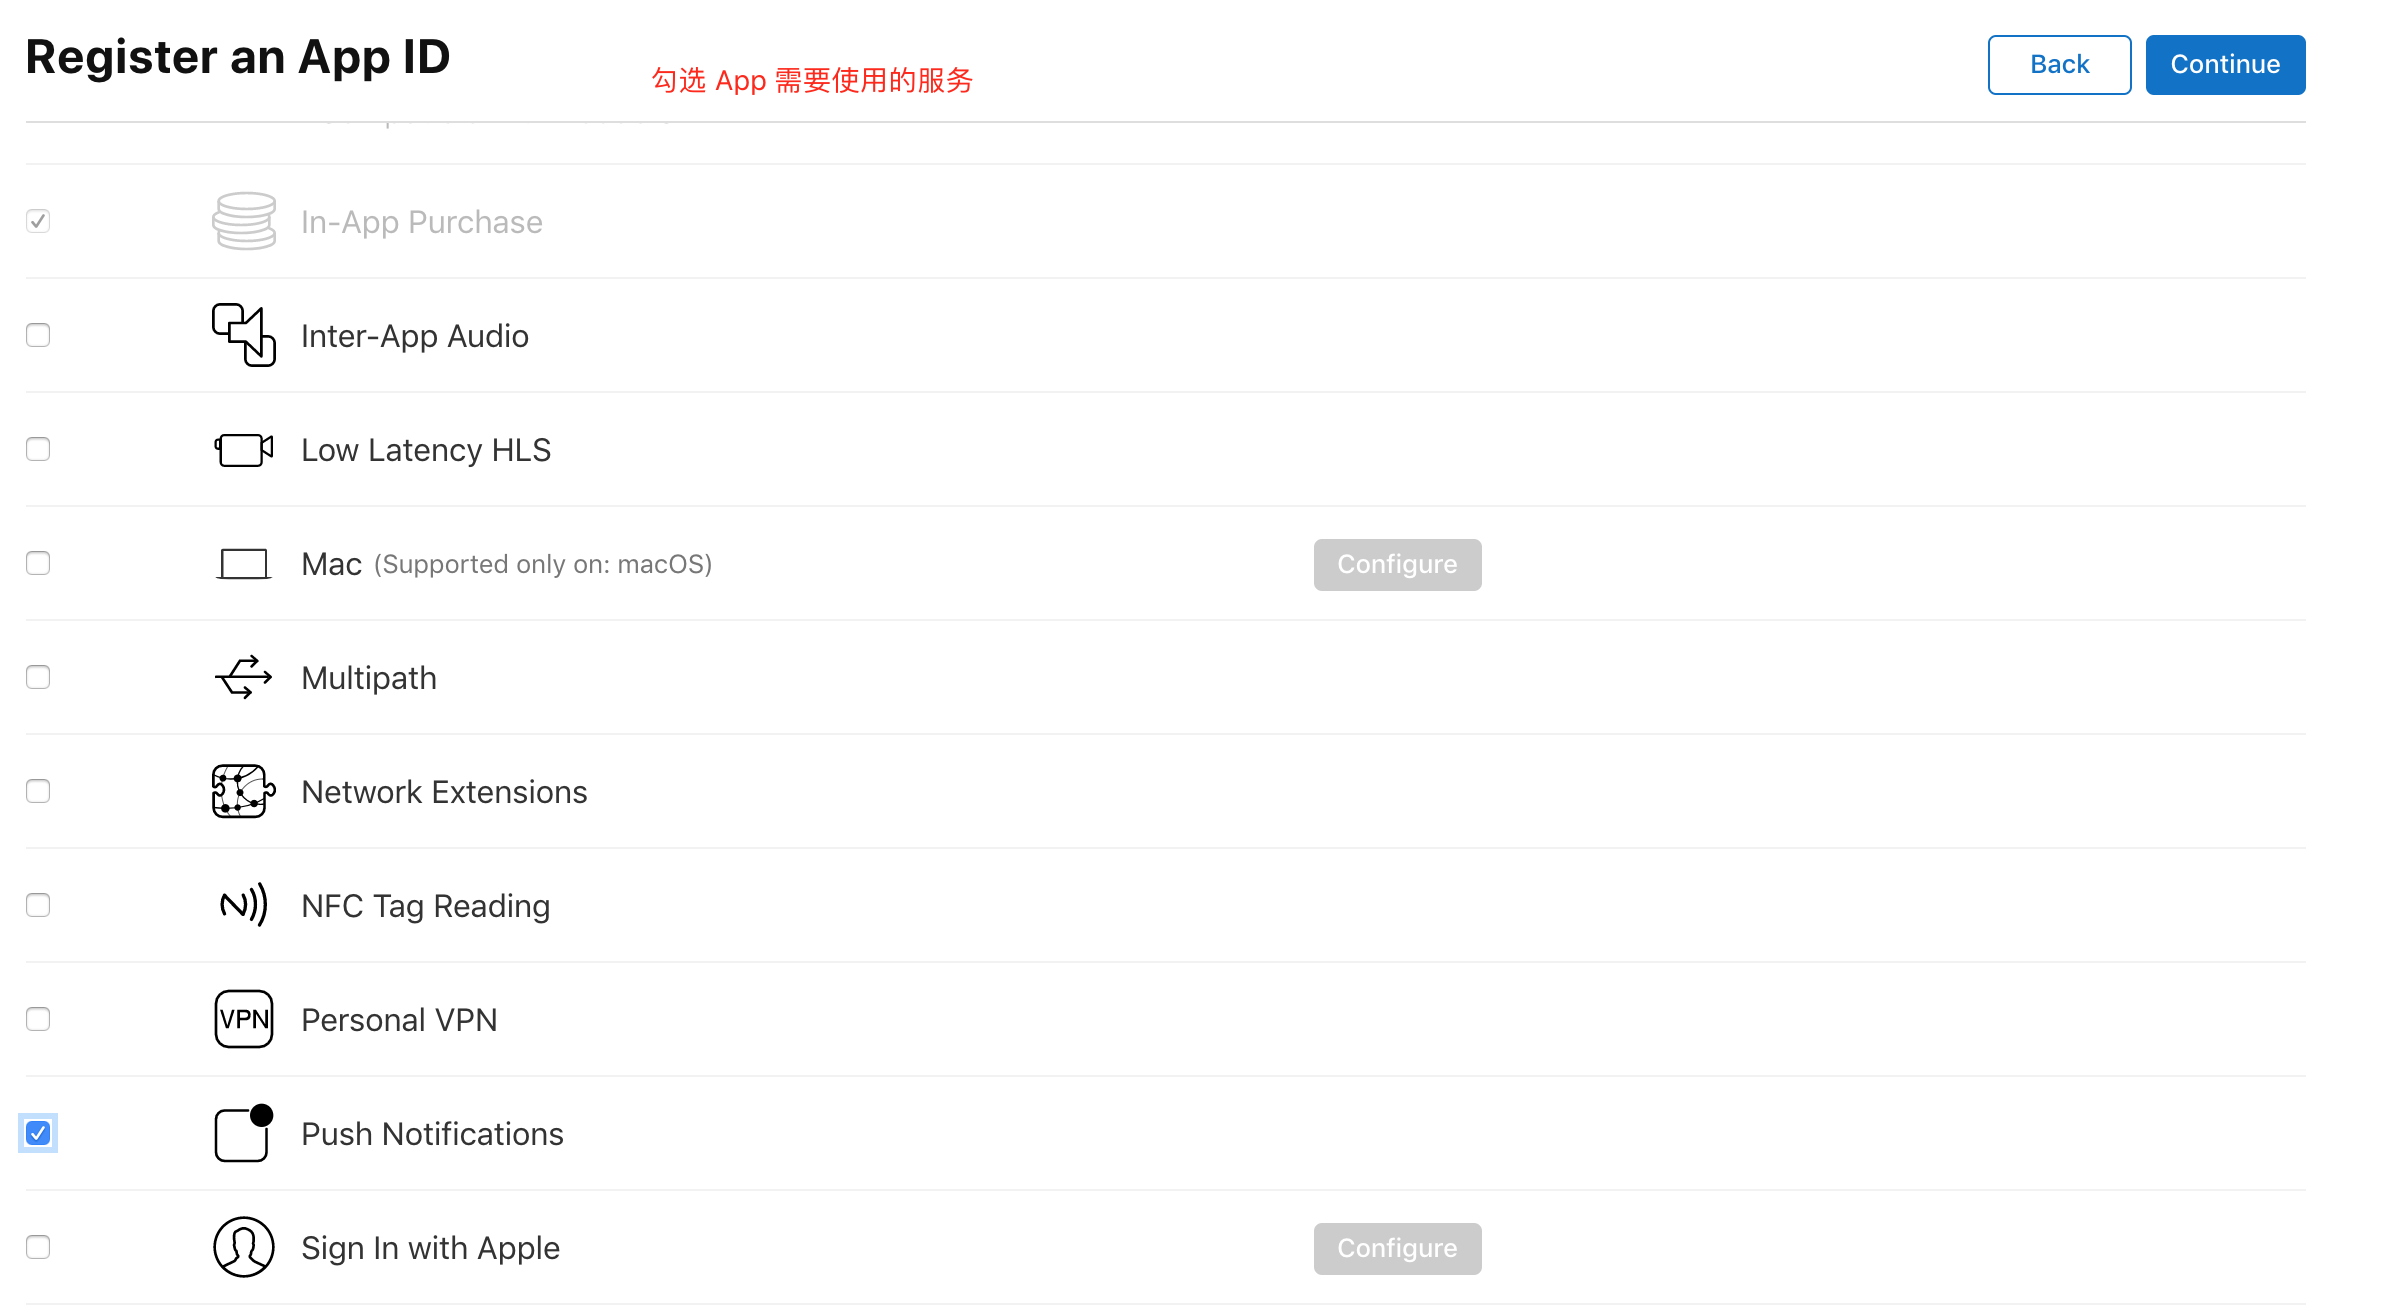
After confirmation, select submit and return to the identifiers page to see the newly created app ID:
At this point, the app ID has been created. Next, you need to create a development certificate. Before creating a development certificate, you need to create a certificate request file
Generate certificate request fileGenerate certificate request file
Certificate request (. Certsigningrequest) file is required for either development certificate application or distribution certificate application. The certificate request file needs to be generated on Mac OS using “Keychain access” tool.
Search for “Keychain” in “Spotlight search” and open the “Keychain access” tool: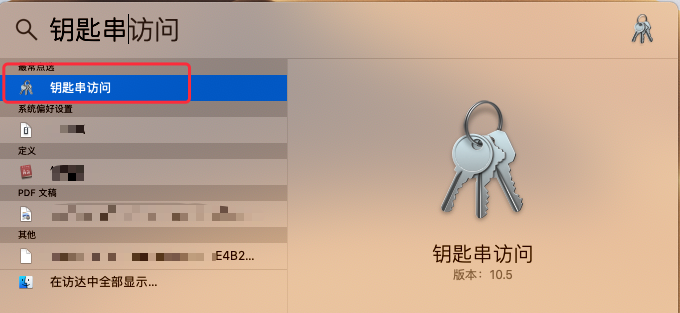
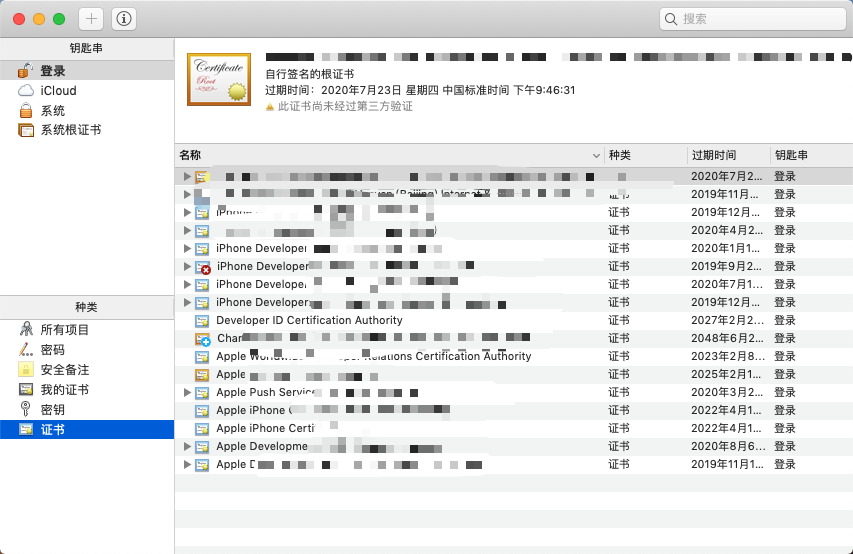
Open the menu “Keychain access” - > “certificate assistant”, and select “request certificate from certification authority…”:
Open the create request certificate page, enter the user’s email address and common name in the page, select Save to disk, and click “continue”:
The file name is “certi” ficateSigningRequest.certSigningRequest ”, select the save location, and click “store” to save the certificate request file to the specified path. It is required to apply for development certificate and release certificate later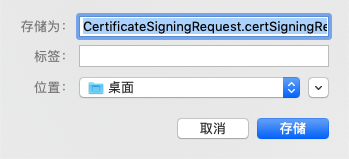
Application for development certificate and description documentApplication for development certificate and description document
The development certificate and the corresponding description file are used in the development phase. The app can be directly installed on the mobile phone. A description file can be bound to 100 test devices at most (the development certificate cannot be used to publish applications to the app store).
Application for Development CertificateApplication for Development Certificate
Select “certificates” on the certificate management page to view all certificates applied (type: development is development certificate, distribution is publishing certificate). Click the plus sign on the page to create a new certificate
Select “IOS app development” under “software”, and then click “continue”: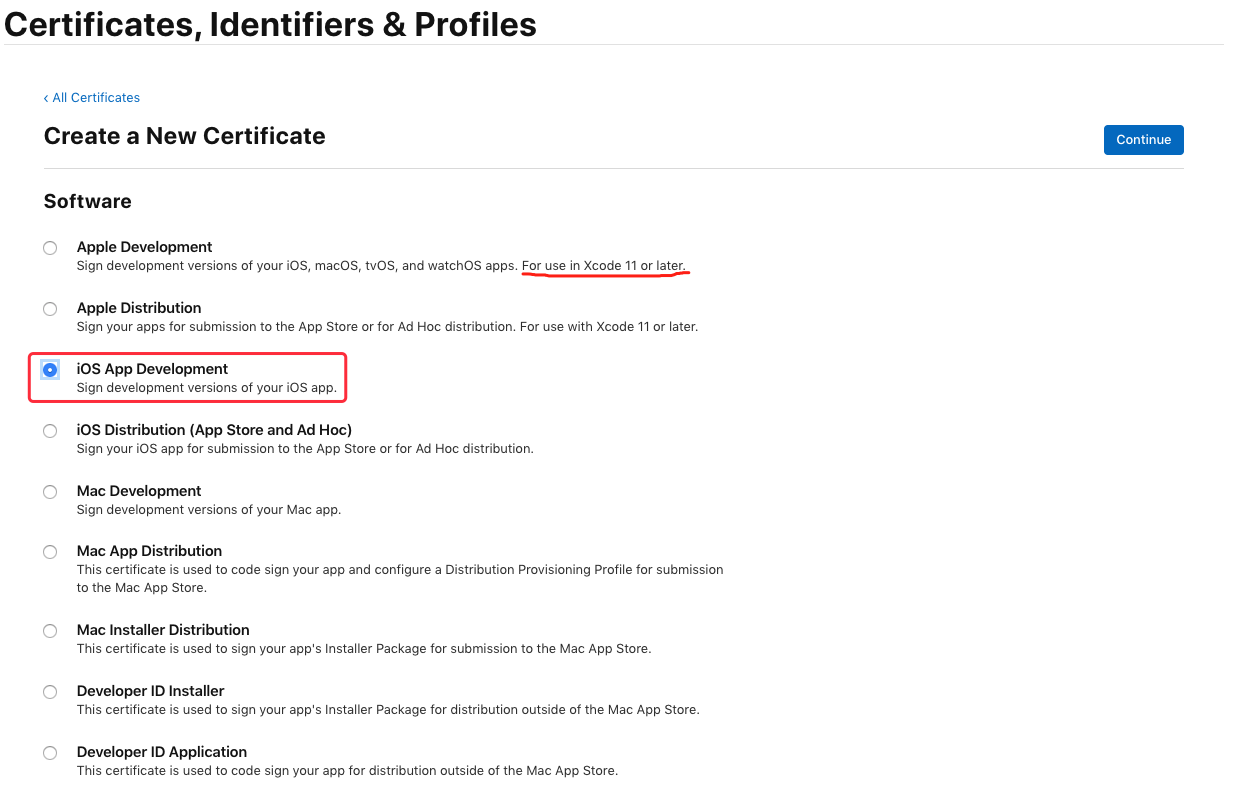
Next, you need to use the certificate request file just generated. Click “choose File…” to select the “certi” that has just been saved to the local ficateSigningRequest.certSigningRequest ”File, click “continue” to generate the certificate file:
After generating the certificate, select “download” to download the certificate to the local (IOS)_ development.cer ):
Double click Save to local IOS_ development.cer File, the “Keychain access” tool will be opened automatically, indicating that the import certificate is successful. You can see the certificate just imported in the certificate list. Next, you need to export the. P12 certificate file. Select the imported certificate and right-click to select “export…”: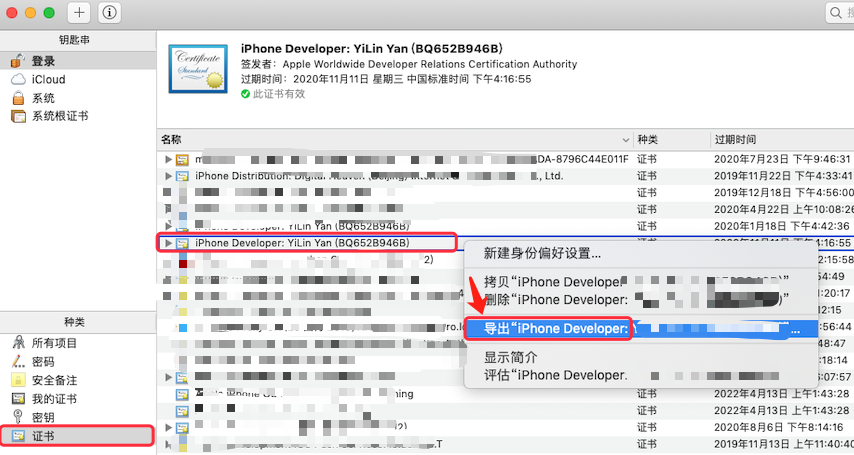
Enter the file name, select the path, and then click “store”: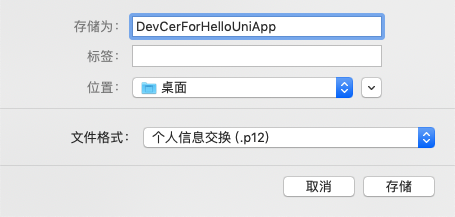
After entering the password and confirming the password, click “OK”: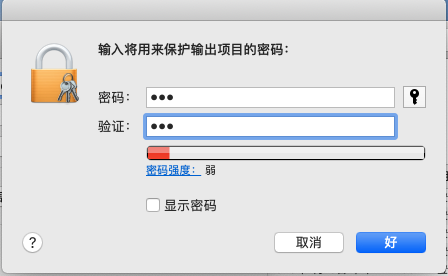
So far, we have completed the production of the Development Certificate (obtained the xxx.p12 certificate file). Next, we continue to generate the description file needed in the development phase. Before generating the description file, we need to add debugging devices (iPhone, iPad) first
Add debug deviceAdd debug device
The development description file must be bound with debugging devices. Only authorized devices can directly install apps. Therefore, before applying for development description files, add debugging devices first.
(skip this section if you have added devices)
Select “devices” on the certificate management page to view the information of all devices added. Click the plus sign on the page to add a new device
Fill in the equipment name and UDID (equipment identification)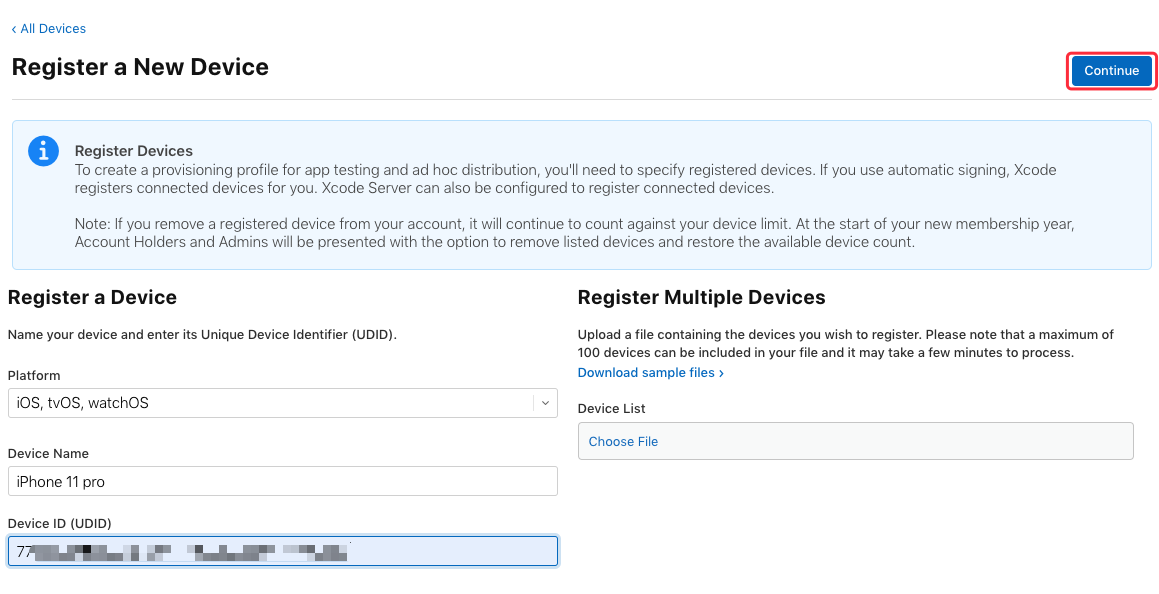
To get the device UDID method, connect the device to the computer, start iTunes, click this area to switch to display the device UDID, and right-click to select copy
After input, click “continue” to complete the addition;
Next, continue to apply for the description document
Development description documentDevelopment description document
Select “profiles” on the certificate management page to view all the applied description files. Click the plus sign on the page to add a new description file
Select “IOS app development” under “development”, and click “continue” button: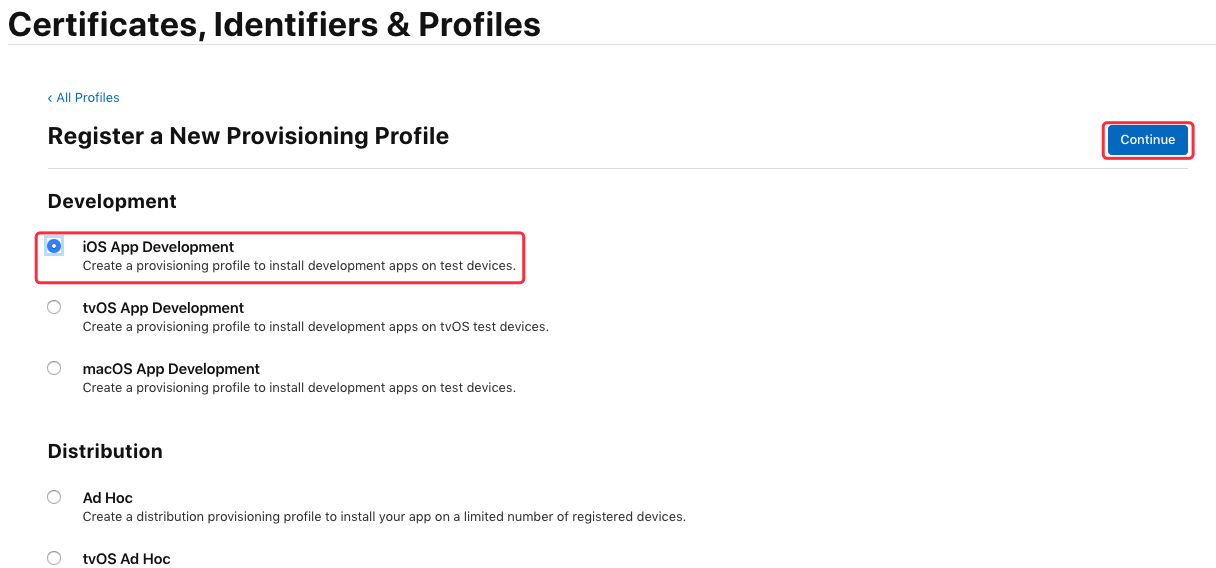
Here, select the previously created “app ID” (here is“ io.dcloud.hellouniapp ”)Click “continue”: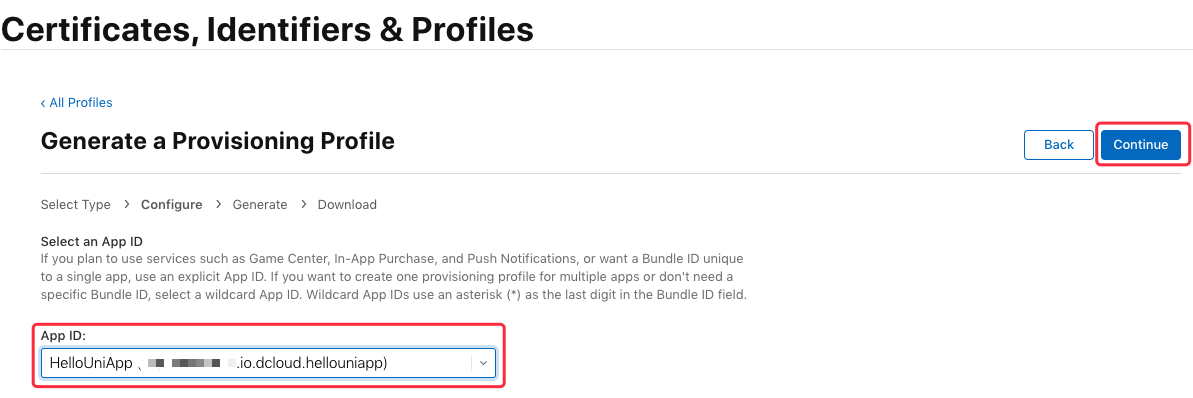
Next, select the certificate to be bound. It is recommended to check “select all” directly and click “continue”: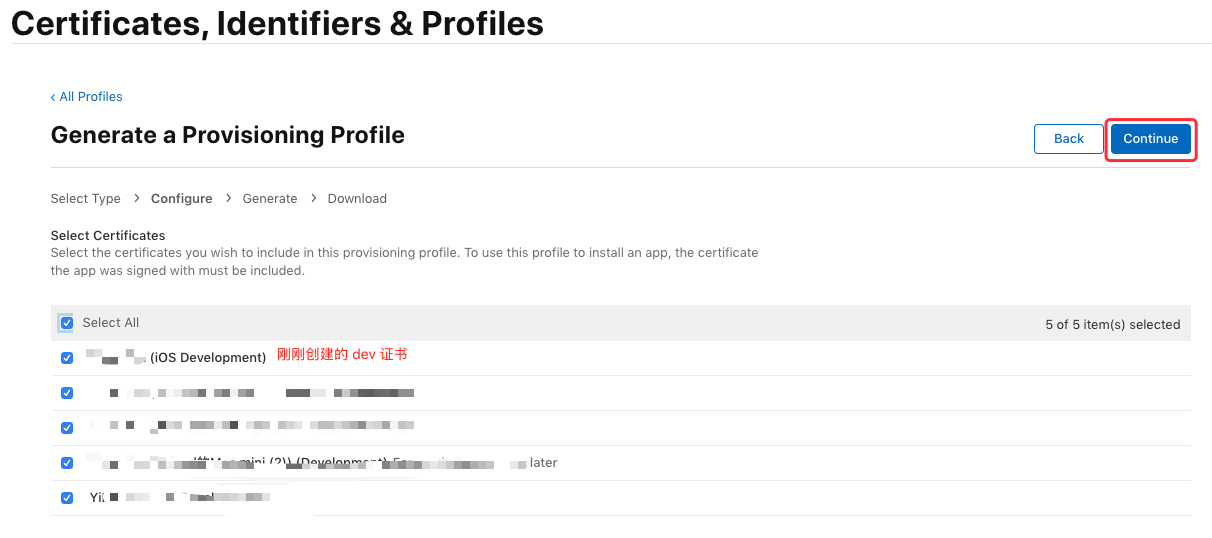
Select the authorized debugging equipment. It is recommended to check “select all” and click “continue” directly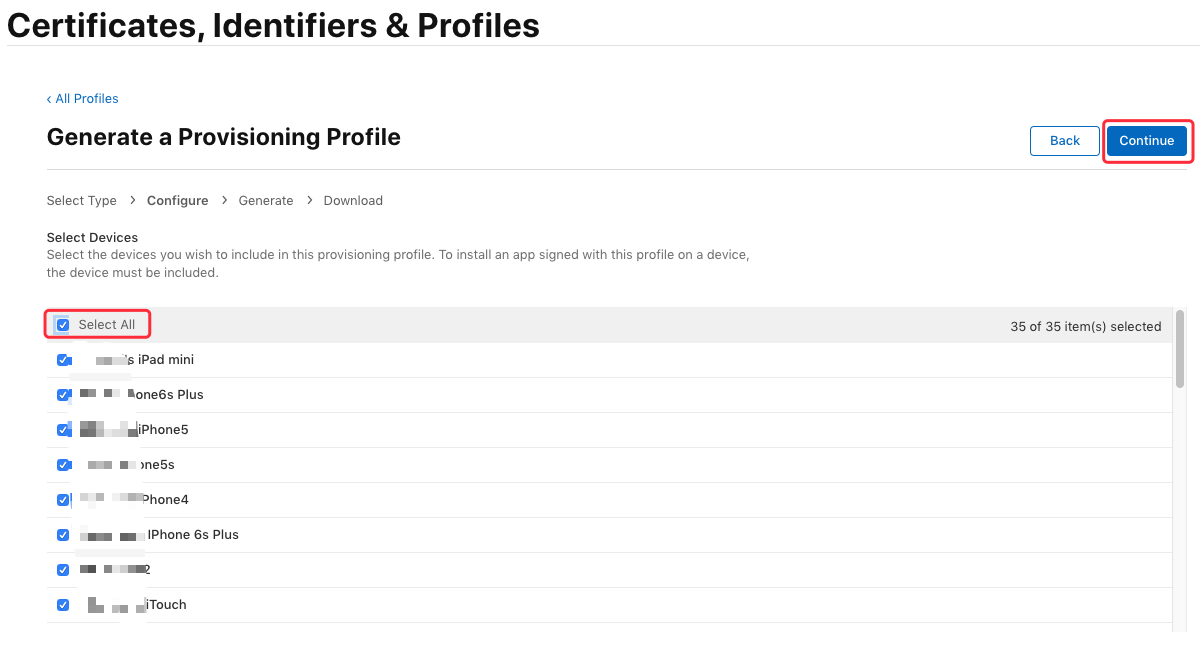
Enter the name of the description file (such as “Hello uniappprofile”) and click “generate” to generate the description file: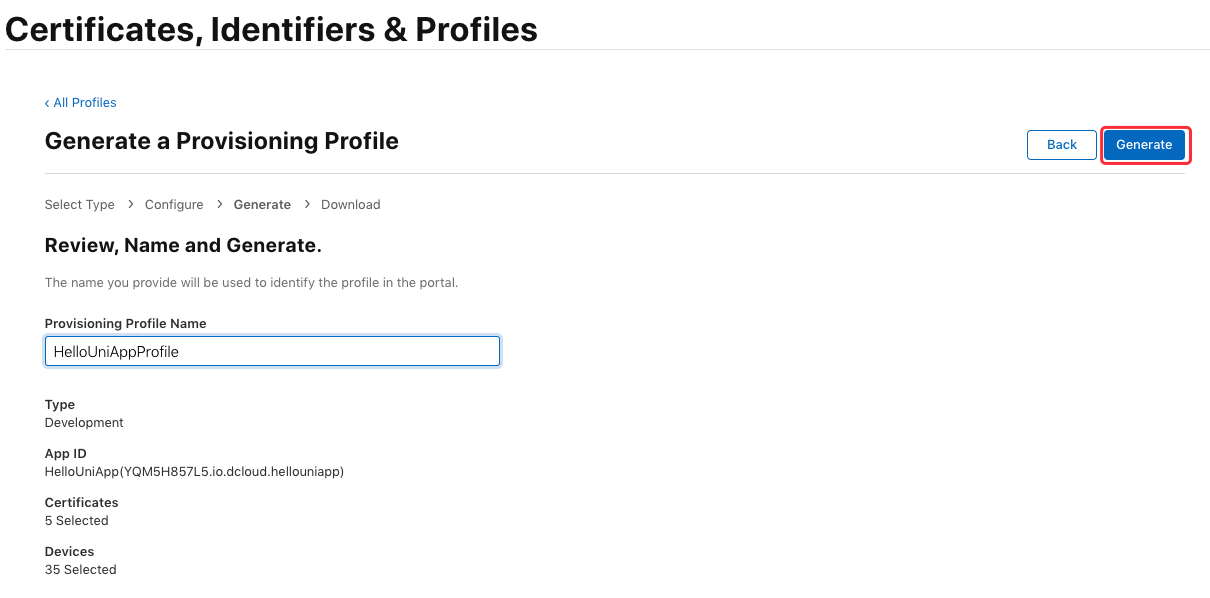
Click “download” to download and save the development description file (file suffix is. Mobileprovision)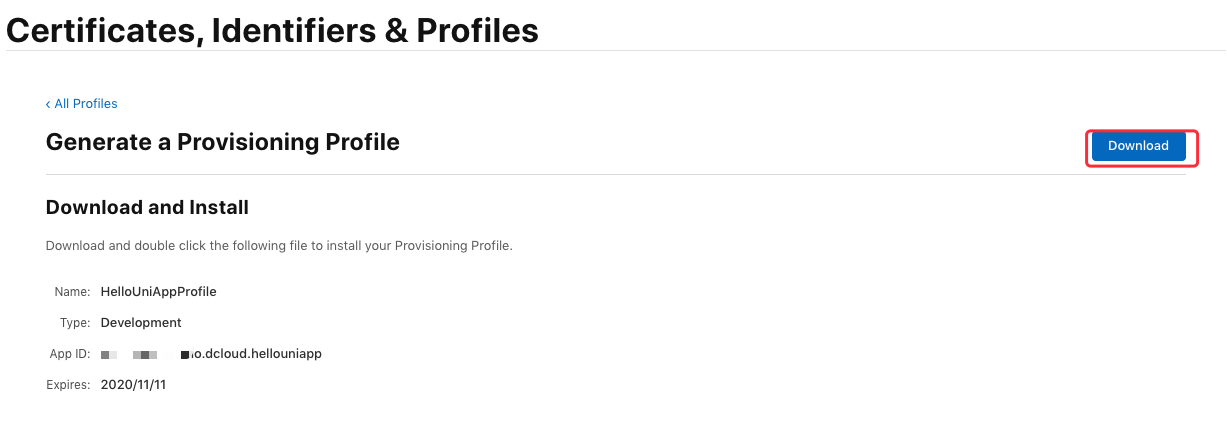
So far, we have obtained the Development Certificate (. P12) and the corresponding description file (. Mobileprovision). Next, let’s take a look at how to make the release certificate and release description file
Application for distribution certificate and description documentApplication for distribution certificate and description document
The production certificate is used in the formal release environment, and is used to submit to the Appstore for audit and release. IPA with certificate package can not be installed directly on mobile phone
Application for production certificateApplication for production certificate
Select “certificates” on the certificate management page to view all certificates applied (type: development is development certificate, distribution is publishing certificate). Click the plus sign on the page to create a new certificate
Select “app store and ad hoc” under “software”, and click “continue”: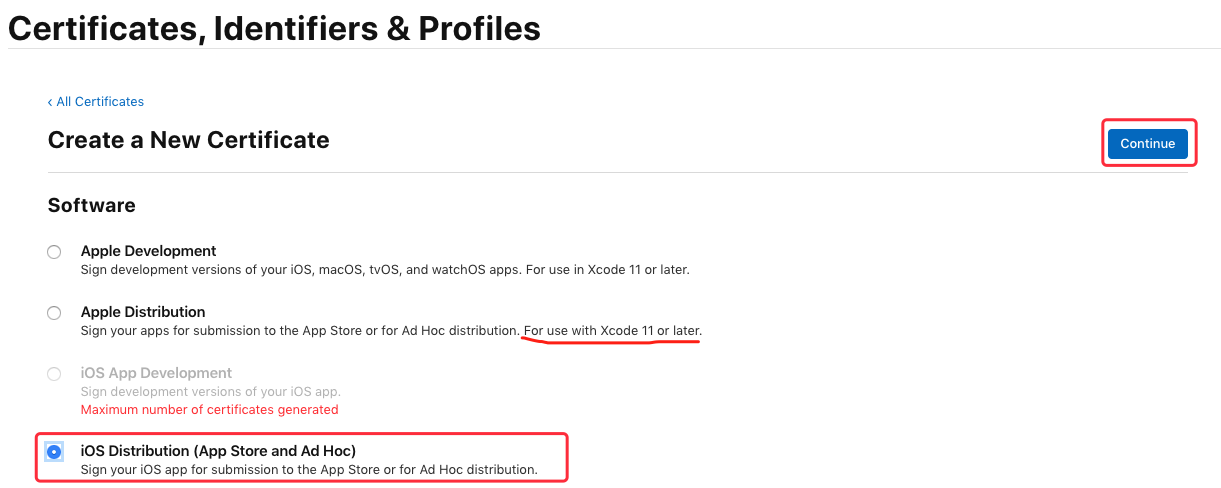
Next, you also need to use the certificate request file generated before. Click “choose File…” to select the “certi” that has just been saved to the local ficateSigningRequest.certSigningRequest ”File, click “continue” to generate the certificate file:
The certificate is generated successfully. Select “download” to download the certificate to the local (IOS)_ production.cer ):
Similarly, double click to save to your local IOS_ production.cer File import the certificate into the “Keychain access” tool. You can see the certificate just imported in the certificate list. Next, you need to export the. P12 certificate file. Select the imported certificate and right-click to select “export…”: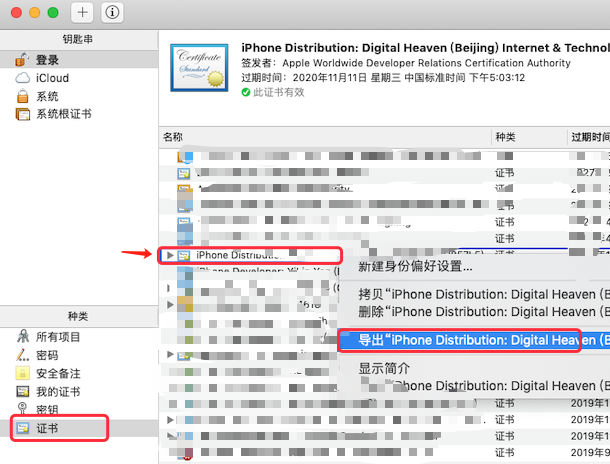
Enter the file name, select the path, and then click “store”: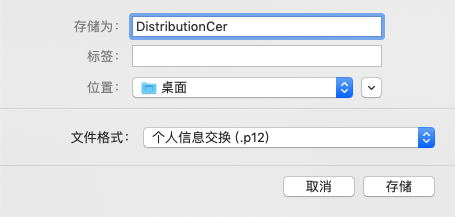
After entering the password and confirming the password, click “OK”:
So far, we have completed the production of the release certificate (obtained the xxx.p12 certificate file). Next, we continue to generate the release description file
Distribution description documentDistribution description document
Select “profiles” on the certificate management page to view all the applied description files. Click the plus sign on the page to add a new description file
Select “app store” under “distribution”, and click “continue” button: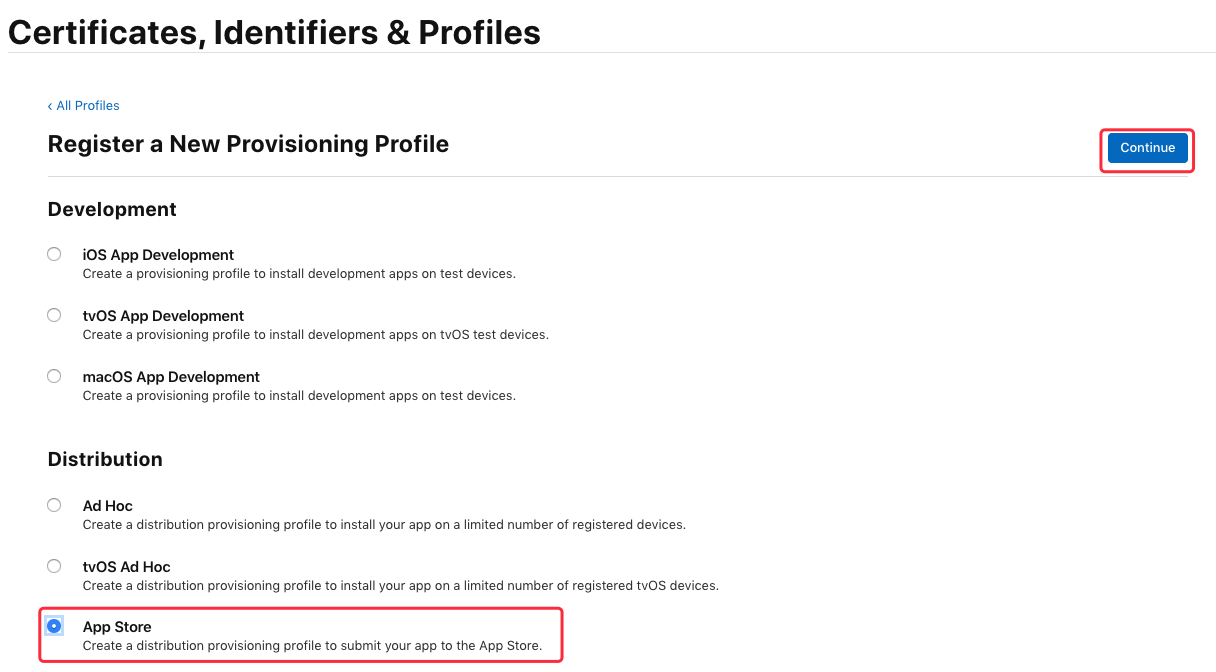
Here, select the previously created “app ID” (here is“ io.dcloud.hellouniapp ”)Click “continue”:
Next, select the IOS distribution to be bound. Check the newly generated release certificate here and click continue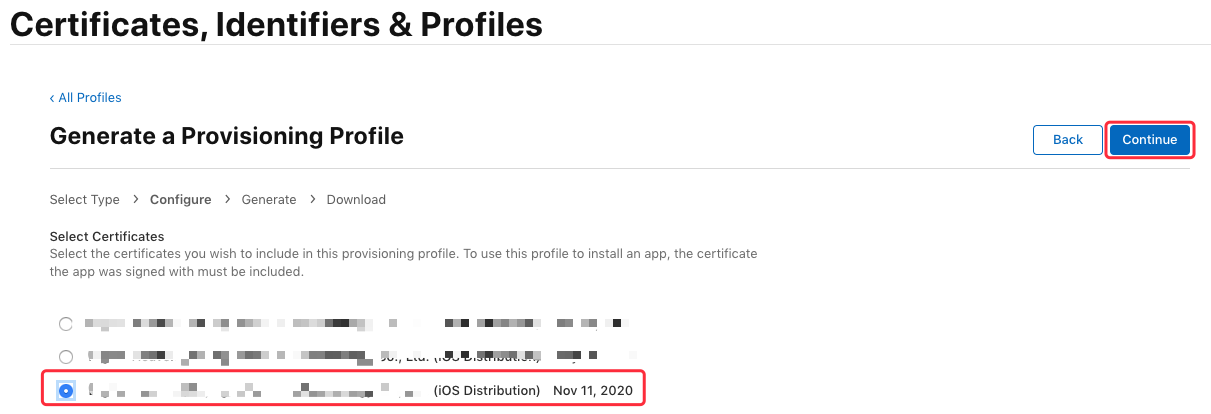
Next, enter the name of the description file (such as “Hello uniapp profile distribution”) and click “generate” to generate the description file:
Then click “download” to download the description file locally (file suffix is. Mobileprovision)
So far, we have obtained the release certificate (. P12) and the corresponding release description file (. Mobileprovision)
Source: https://ask.dcloud.net.cn/article/152
